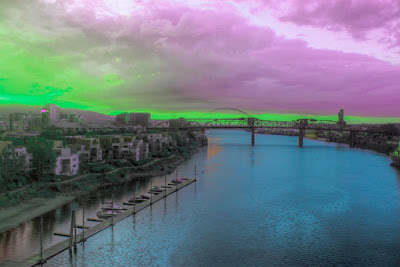
Wednesday, January 2, 2013

I hate my Smart Phone

Okay, that's a lie. I don't hate my Smart Phone. I actually love it. What I hate is the fact that it has kept me from using my dSLR. Why lug around a large, heavy camera when I can throw something that's smaller and lighter than my wallet in my bag and get decent pictures on the go? Not only that, but it provides instant gratification in allowing me to share the photos on Facebook, Instagram, or wherever seconds after snapping the shots. If I'm feeling adventurous, I can even alter the photos using one of several photo-editing apps.

But at the same time, this makes me sad. I seem to have abandoned my love of photography for a love of bicycling. And my priority when it comes to cycling is to keep my load light.

However, a recent excursion to Fort Funston reawakened my passion. A friend and I biked there to hang out and watch the sunset. I brought my camera on a whim and am so glad I did. Here are some of the shots I got that evening:


For this one, I set my camera facing the sky and set the shutter speed to 30 seconds. Stars!

These plants look amazing in the sunset.
Taken using a long exposure with the camera propped on a ledge.

Another longer exposure (I think 10 seconds), while my friend rode his bike down the road with his rear light flashing.

All in all, I'm pretty pleased with these. As usual, you can find the rest of them here. The experience reminded me of how much I love capturing these moments. I've also been bringing my camera to more social events. I'm sure my iPhone could do a fine job of getting the essence of these gatherings, but it couldn't get a shot like this:

Doesn't that make you wanna eat some avocado?
And the phone's camera definitely couldn't have managed this one:


So Canon dSLR, I apologize for neglecting you for so long in favor of a sleeker option. As in life, the path of least resistance isn't always the best path to take.

Sunday, May 13, 2012

The playground we call San Francisco

It's been way too long since I've posted. Unfortunately, I don't really have anything interesting or amazing to share with regard to my photography. I still don't have a better tripod, and I have yet to invest in a new lens. I also haven't really been manipulating anything in Photoshop or Aperture. However, I've been having fun shooting various subject matter in and around San Francisco, which I'll continue to do. And maybe I'll take some time to do some interesting things with them in Photoshop and/or Aperture. Here is a small sampling of what I've been up to:


This is a shot I took from the Wave Organ along the bay, looking back at the city. Hard to tell, but that's what it is. Short depth of focus on the pipe.

Took this picture at a Public Bikes store opening. Their line of bikes looked pretty.

Seagull flying at me during an oyster trip.

Sweet fire during a bike camping trip.


And who doesn't like photos of food? Also taken during a bike camping trip.

I used the 50mm fixed lens for all of these photos. It's pretty much the only lens I use these days, unless I need a wider-angle shot of landscape.

Saturday, May 21, 2011

What is the Opposite of Highlight?

If you know photo editing software, you'd know the answer to the question in this post title: shadow. And that's what this post is about - though not the shadow you think. This post is about our new dog, Shadow. You're probably wondering why I don't just post about her in my regular blog. Believe me, I most likely will. That's where you'll find the detail about how adorably awesome she is. Since I've been taking many pictures of her, I figured I'd highlight (ha) a handful of them for you on this blog and leave out all the mushy-gushy ramblings. I didn't really do much altering to them, besides eliminating some of the saturation in the background so Shadow would stand out more. These were all taken using my 50mm fixed lens. Hope you enjoy!


Thursday, November 11, 2010

Finally, a Great Sunset

Luck was on my side last night. During the day, I had driven into Boston with two girls from work for a corporate event. During the drive home, I noticed the clouds that had been hanging over Massachusetts for days were finally making their way off the coast from west to east. I could barely make out some blue sky on the horizon, and the sun was hanging below the cloud line just enough to blind me. The view was nice, but I didn't really anticipate anything special. But as I got out of my coworker's car and looked up, I noticed the clouds were starting to dip down and take on a pink hue. I couldn't see much of the sky from where I stood, so I quickly got into my car and started heading home. The timing couldn't have been better. The pictures in this post are what I saw. Though I took many of them in threes to get the HDR effect, it really wasn't necessary.

Here are three of HDR photos from last night:


And here are several unadulterated photos:


Finally, I can rest easy knowing I caught at least one amazing sunset this fall!

Saturday, November 6, 2010

Juneau how to tilt-shift?

It's been a while. I haven't stopped taking photos...there is a huge backlog of them, most of them hastily posted to Facebook and/or my overflow website. I've also been managing to post photos to the Boston.com RAW website, which has photo challenges and monthly contests. This leaves me with little time to play with my own photos for the benefit of this blog.

As I was looking through some old Alaska pictures, taken with the Fujifilm, I realized there were a couple from Juneau that may make good tilt-shift images. Turns out I was right:


I took these while we were riding up the tram to the top of a hill. Hence the bit of reflection in them. Even so, they turned out pretty nicely. I especially like the first one. The second I did two versions of; one to showcase the buildings of the city, and the other to showcase the mountains.

Considering it's autumn, and I have yet to post any fall-like photos, here are a couple I manipulated using Aperture. I like how the bright colors stand out against the muted background. There are plenty more autumn photos in my overflow album.


I know this is a bit of a lame post, so I'll try and play with some more recent photos and post them here. I'm looking forward to capturing some great sunsets in the coming weeks and months; this time of year tends to yield sunsets with those nice deep purples and oranges. Let's just hope the nice sunsets fall on weekends, since after we turn back our clocks tonight, I'll be driving home from work in the dark!

Tuesday, September 21, 2010

Samples of "fake" HDR Photos

I decided to take some old sunset photos I really like and see what would happen if I created "fake" HDR versions of them using the Photomatix plug-in for Aperture. I opened each photo in Aperture, created two additional versions, and then adjusted one of the versions to have a -2 exposure and the other to have a +2 exposure. After that I used the Photomatix plug-in to create the HDR image.

As you will see, some quality is lost in the HDR versions, but they still have more vibrant colors. There are several reasons for the loss of quality (or "noise"). First, I was shooting with an ISO of 400, which isn't ideal for obtaining the best results. Though you typically want a higher ISO for low-light situations, it can compromise the integrity of the photo when shooting for HDR and create more noise. (So your best bet when shooting for HDR is to set your ISO to 100.) Second, I wasn't shooting with HDR in mind, so the one frame I took was geared to getting the best sky images (not the foreground). Finally, and I've mentioned this before, using one JPEG to create an HDR image isn't ideal.

That said, here are the results:

Monday, September 20, 2010

Adjustment Layers in Photoshop

Newer versions of Photoshop have what's called "adjustment layers." It's a feature that automatically creates a layer for each general adjustment you make to the photo. You can find it in the palettes on the right side of the screen when you open Photoshop. This is different from adjusting hue/saturation and that sort of thing from the Photoshop menu bar, because it doesn't permanently alter the pixels. What's great about adjustments layers is that you can change each layer individually to affect the overall photo. For example, you can create a black and white adjustment layer and then adjust its opacity to 50% to get muted colors. Then if you want a certain part of the photo to stand out in color, you can brush in the full-color layer underneath. This technique is somewhat difficult to explain, but let me show you what I mean. Below you'll see an original photo and then two versions I created using adjustment layers:
And here is a photo I really played with using adjustment layers:
As you can see, you can go as conservative or crazy as you want. The fun is playing around with layering the adjustments, changing their opacity, and brushing in (or out) color.

(You can do similar things with Aperture, so I'm going to need to play with these same photos in Aperture to find out the difference. The main difference that stands out immediately is that you can see and adjust each layer in Photoshop, whereas in Aperture what's done is done unless you choose to completely undo the adjustments. Aperture doesn't work in layers.)